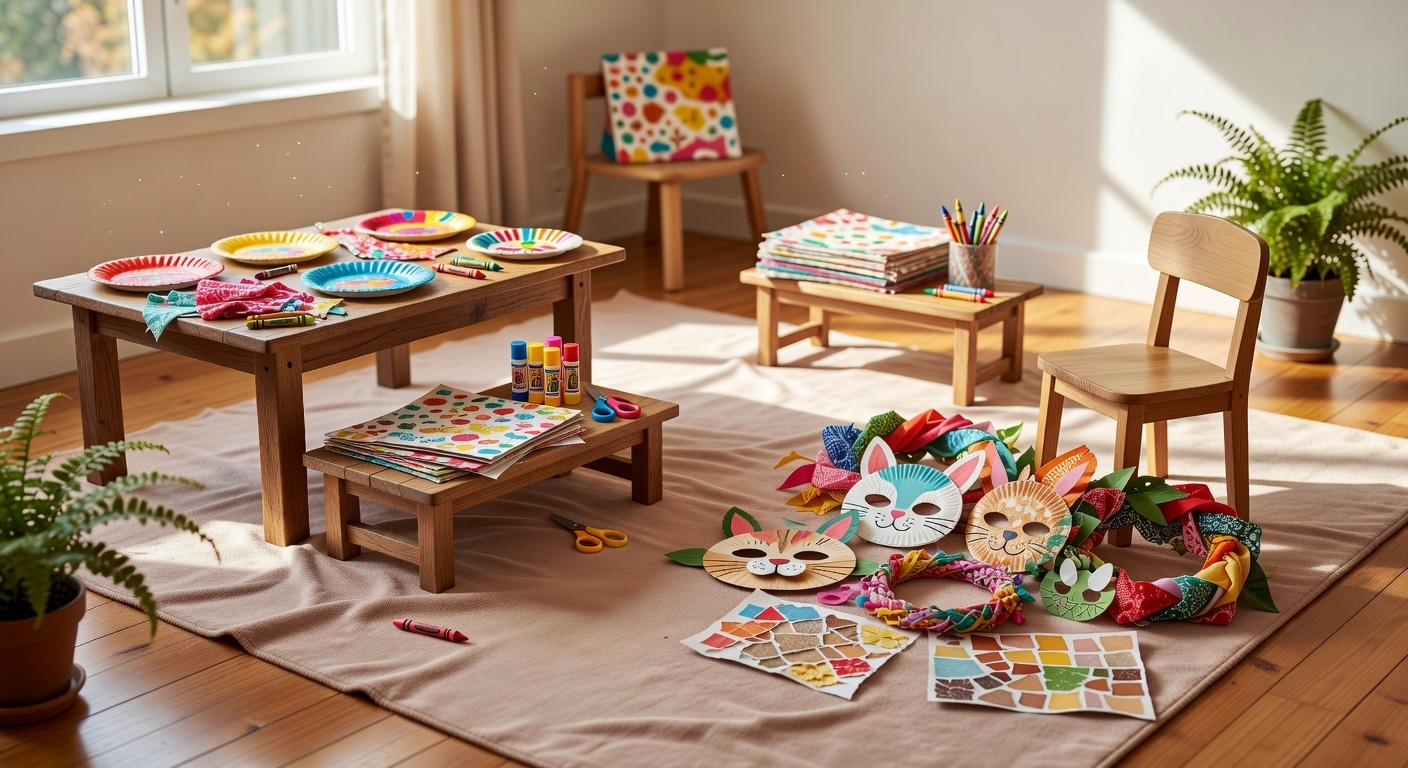
When Maya turned a plain plate into a glowing sunburst, she laughed as the colors radiated like a sunrise in her kitchen. You can start by tracing a circle, cutting 8‑inch rays, and gluing bright paper strips to the rim, simple steps that spark pride. Follow each guide, measure cuts, and watch the craft transform, then discover 20 more projects that will fill your afternoon with color, teamwork, and endless imagination.
Create a Bright Sunburst Paper Plate
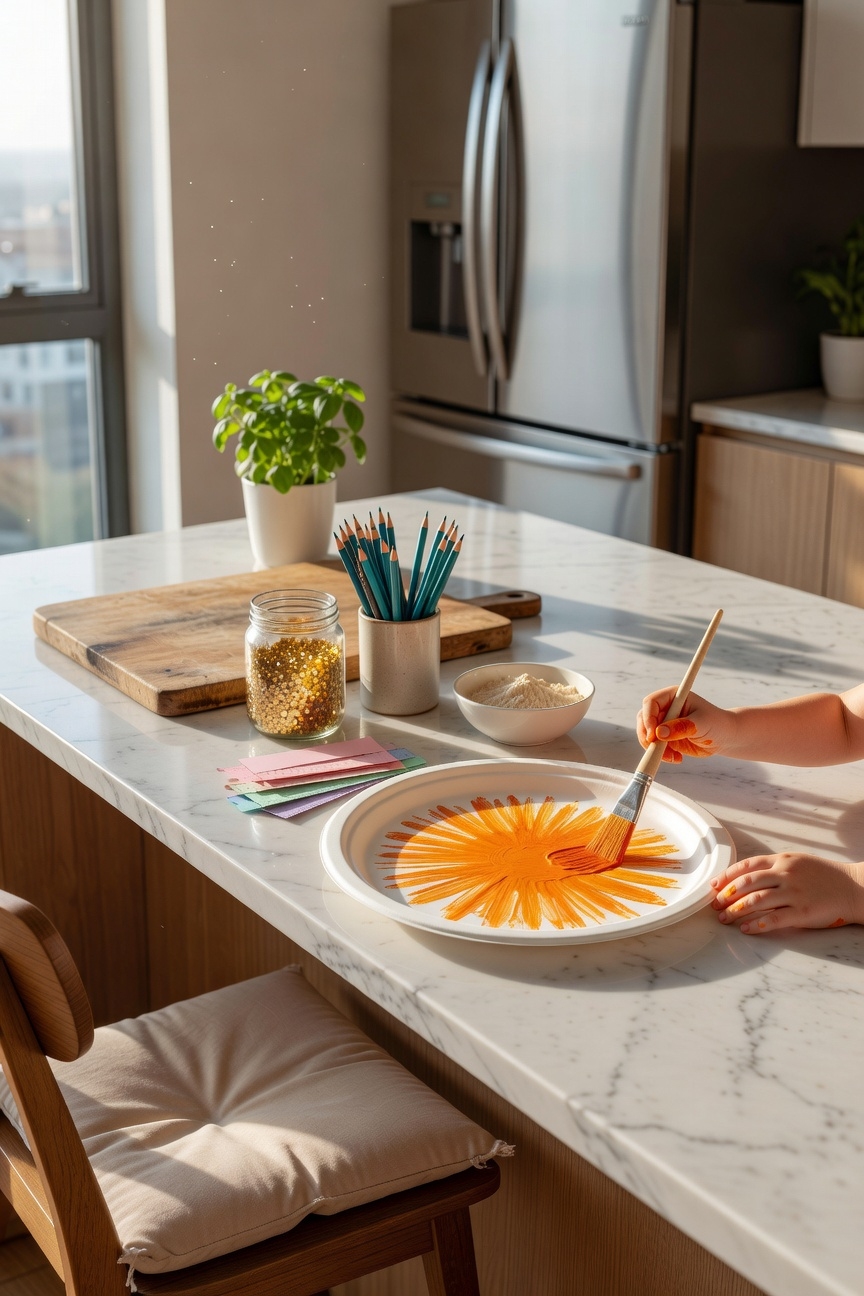
One bright idea to kick off the project is to start with a plain paper plate and turn it into a radiant sunburst. Cut the plate into eight equal wedges, then paint each wedge with sunshine colors, yellow, orange, gold. Use easy materials like non‑toxic crayons or washable markers. Glue the wedges back, creating a glowing circle. Your child will love the sparkle! This activity sparks creativity in children while requiring only minimal supplies that you likely already have at home.
Craft a Paper Plate Buzzing Bee
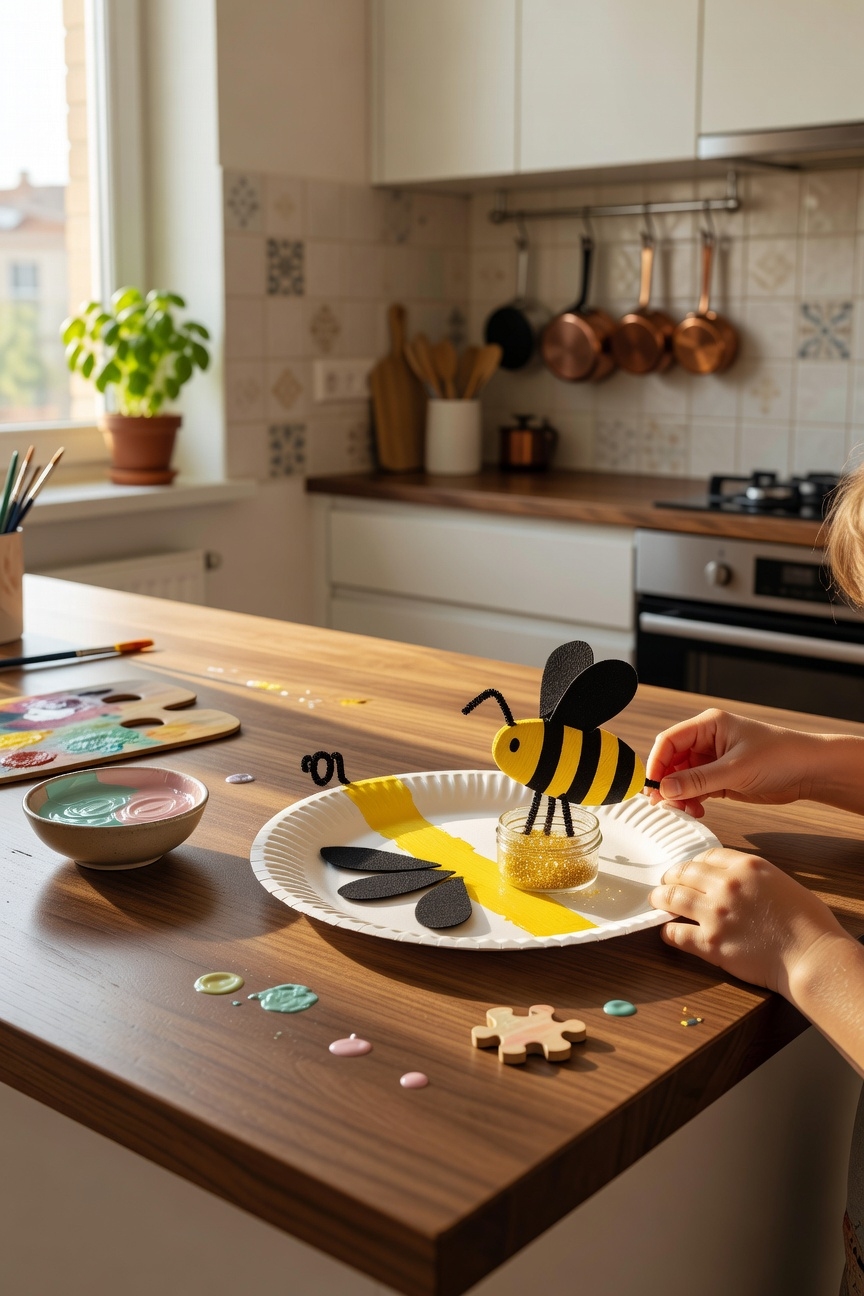
Two simple steps turn an ordinary paper plate into a buzzing bee that will delight any kid. First, paint the plate bright bee colors, yellow and black stripes, using non‑toxic acrylics; let it dry ten minutes. Then, attach a pipe cleaner antenna and a small paper wing, and place a tiny crinkled straw inside to create gentle buzzing sounds when you blow. This craft develops fine motor skills while encouraging imaginative play and creative expression. Enjoy!
Make a Paper Plate Roaring Dinosaur
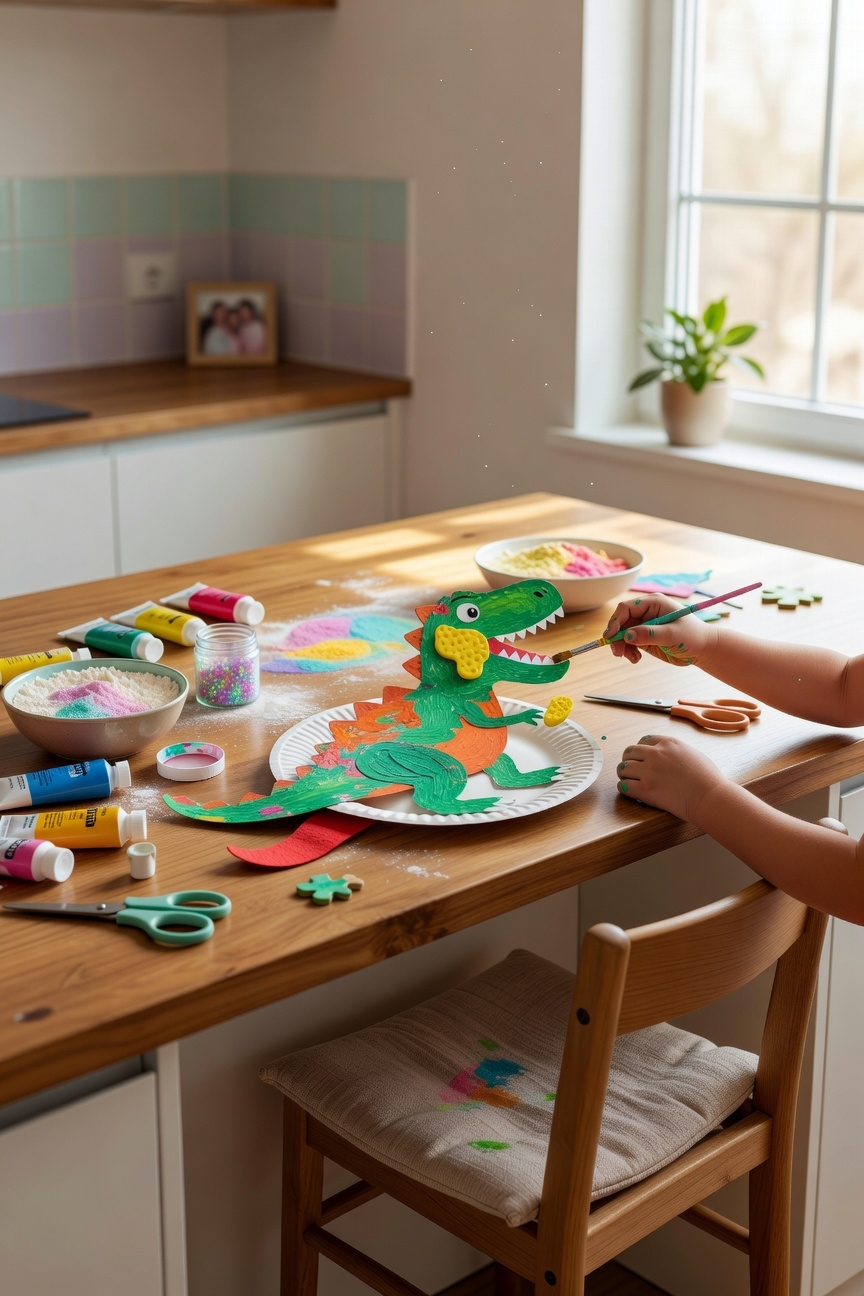
Grab a sturdy paper plate and turn it into a roaring dinosaur that stomps across your kitchen table! Cut a tail, attach a neck, and paint bright dinosaur colors, green, orange, or teal, while you talk about dinosaur habitats like forests or deserts. Glue sturdy eyes, add spiky scales, and let it roar loudly. You’ll love watching it march, and it’s safe, fun, and educational! For extra creativity, combine this craft with natural materials like leaves and sticks to create a more realistic dinosaur habitat display.
Design a Paper Plate Animal Mask
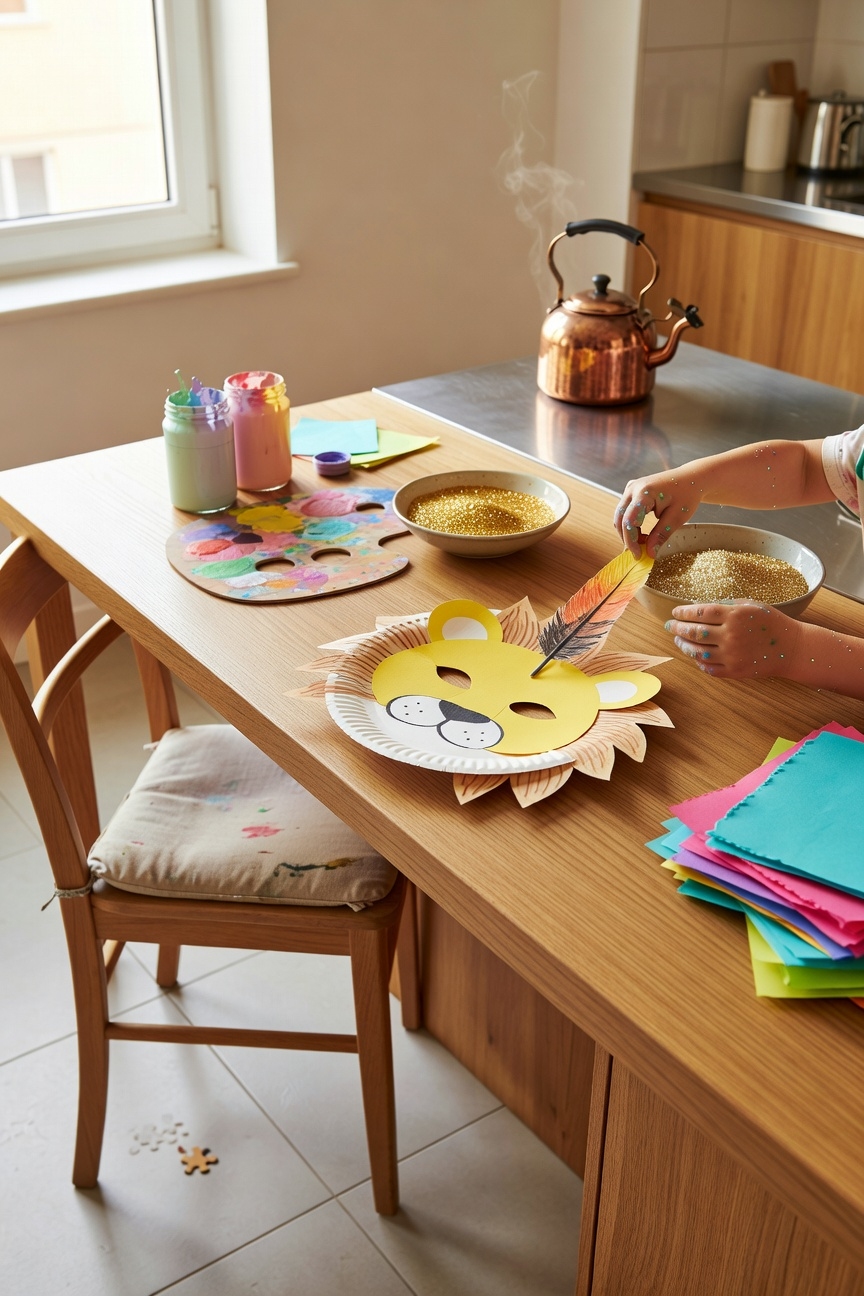
When you gather a sturdy paper plate, you can transform it into a wild animal mask that lets kids become the creature they imagine, whether it’s a fierce lion, a clever fox, or a soaring eagle. Choose mask designs that highlight animal characteristics; use safe kid friendly tools for cut‑outs, then apply face painting, vivid color combinations, and varied paper textures. Follow simple craft techniques, add storytelling elements, and encourage creativity with art supplies! These creative recycled crafts transform ordinary household items into memorable keepsakes that spark imagination and learning.
Build a Paper Plate Flower Garden
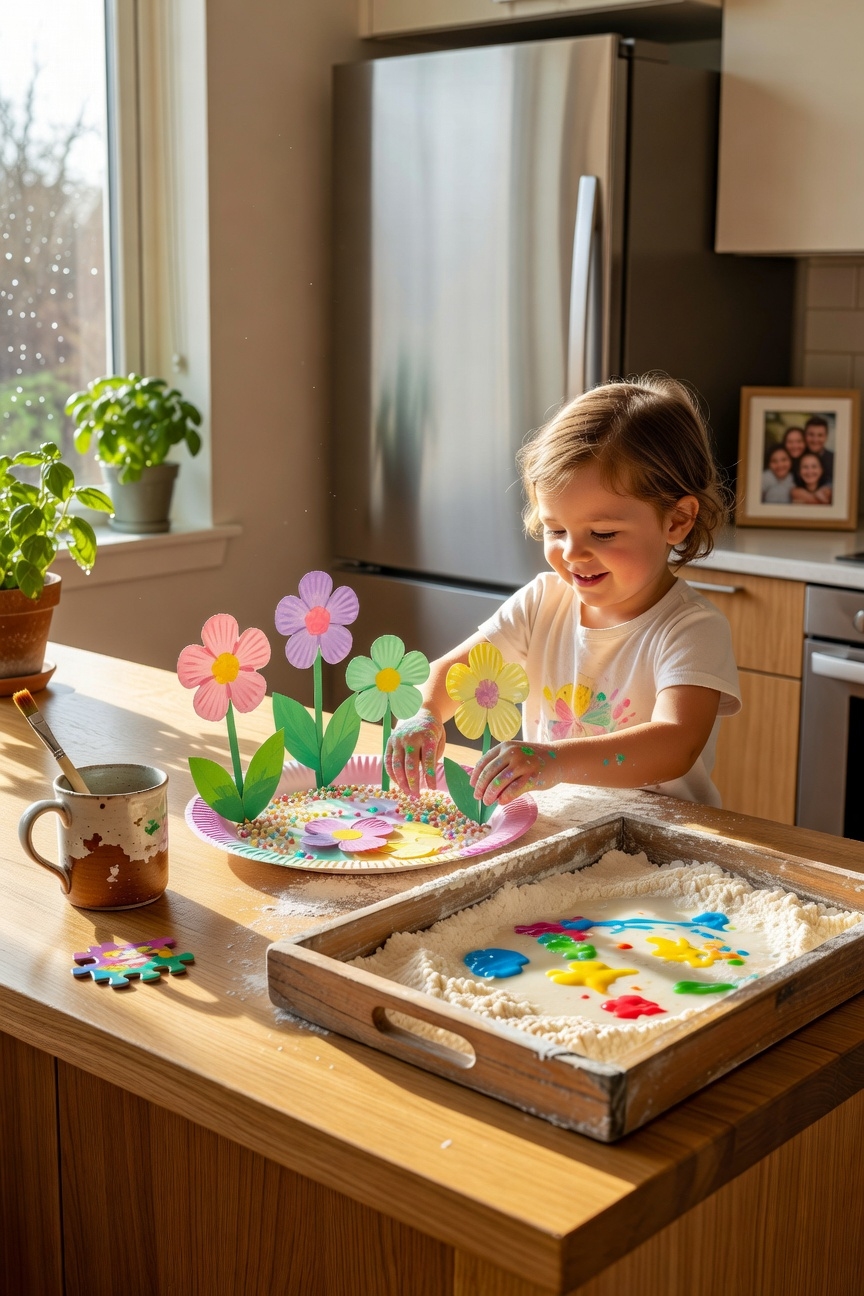
Gather a few sturdy paper plates and a handful of colorful craft supplies, then let’s turn them into a blooming garden that’ll brighten any wall! Cut a plate in half, draw a flower stem, then attach petals with safe glue. Add a garden background using painted paper. Layer multiple flowers, press gently, and admire your vibrant, kid‑created masterpiece! This project is perfect for no-mess crafts that keep toddlers engaged without overwhelming parents with cleanup.
Make a Paper Plate Friendly Octopus
One bright paper plate can become a smiling octopus in just a few minutes! Cut a circle for the head, then glue bright octopus colors onto it. Attach eight flexible tentacle designs using safe scissors and tape, each about four inches long. Add googly eyes for personality. Press gently, let it dry, and watch your friendly sea creature wobble proudly!
Assemble a Paper Plate Mini Rocket
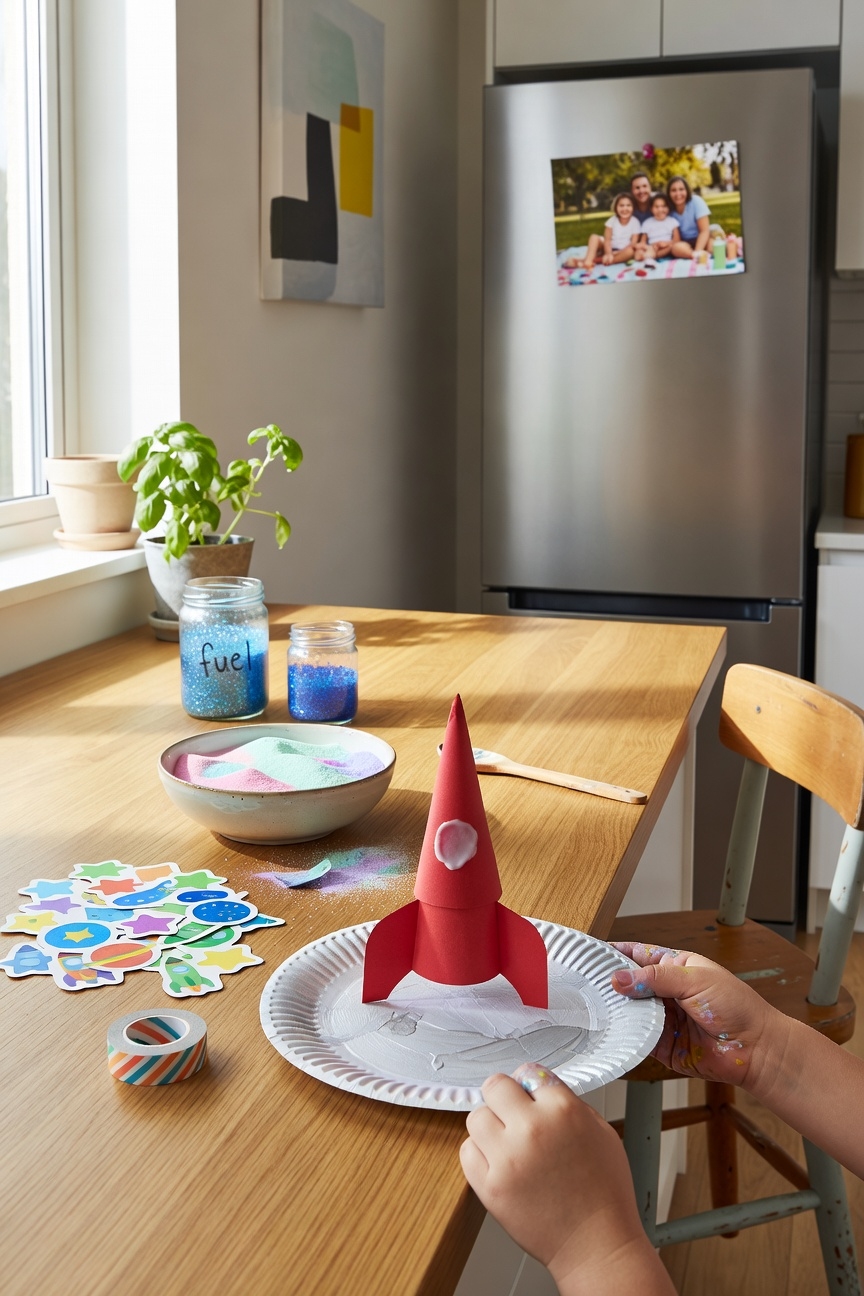
After finishing the friendly octopus, grab another paper plate and turn it into a mini rocket that can blast off from your kitchen table. Cut a triangle for the nose, fold side flaps for fins, and tape securely. Decorate with bright rocket decorations and choose bold rocket color schemes. Encourage kids to personalize, then proudly launch their safe, imaginative spacecraft!
Turn a Paper Plate Into a Cheery Smiley
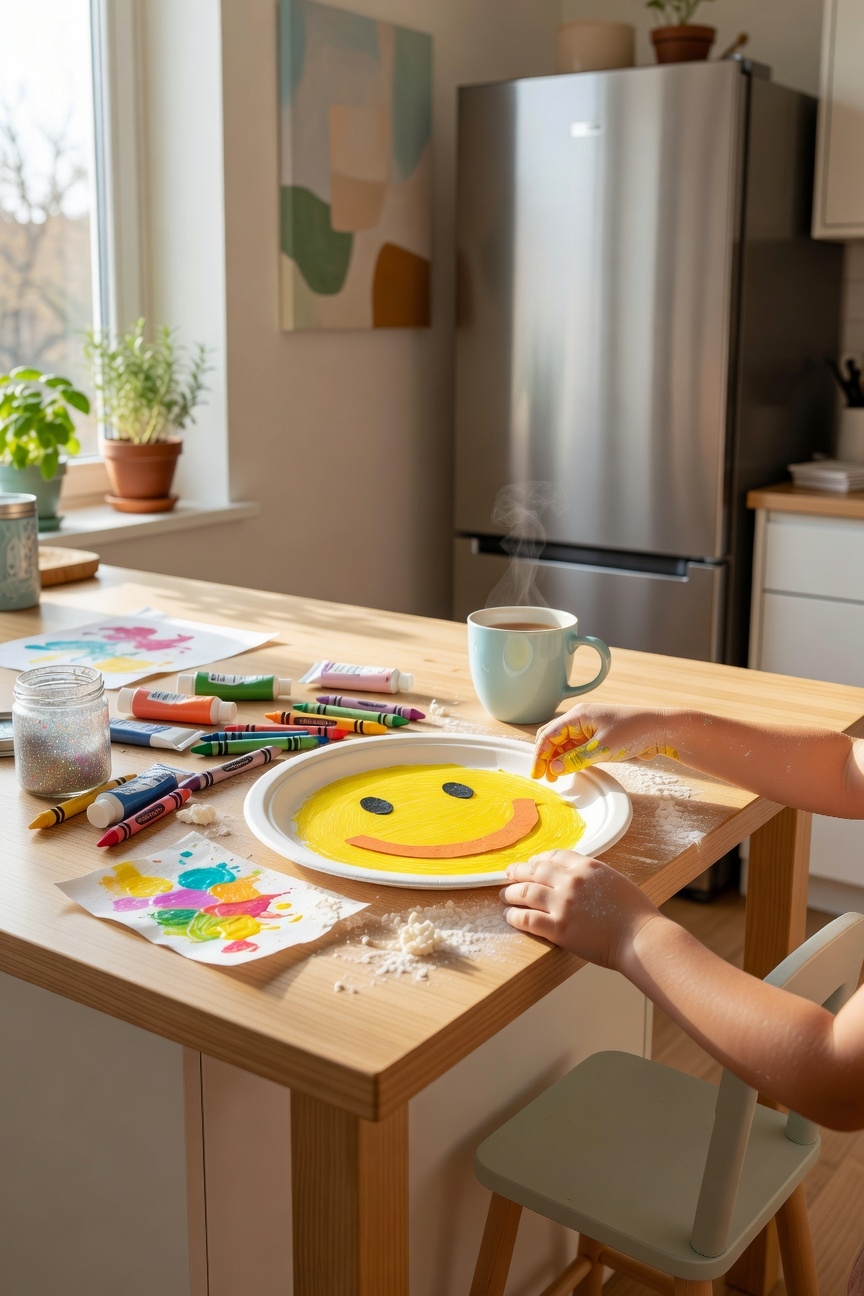
A bright, friendly grin can appear on any plain paper plate in just a few minutes. First, gather a paper plate, markers, and non‑toxic glue. Draw a smiley face with bold, fun colors, then cut out small circles for eyes. Glue them on, add a curved line for a mouth, and let it dry. Your cheerful masterpiece will brighten any room!
Make a Paper Plate Cute Turtle
Your smiling paper plate just showed how a simple shape can become a character, so let’s give it a new adventure as a cute turtle! Cut a half‑circle for the shell, color it with bright turtle colors, then attach a small green head and four sturdy legs using non‑toxic glue. Add a blue backdrop representing turtle habitat. Press gently, let it dry, and admire your safe, happy creation!
Create a Paper Plate Playful Penguin

When you fold a paper plate in half, you instantly get a perfect base for a playful penguin that waddles across the kitchen table! Cut a black triangle for the beak, glue orange felt for cheeks, and attach a white belly piece. Dress the bird in a penguin costume, then place it in a snowy playful habitat. Kids love watching it waddle, and you stay safe with non‑toxic glue!
Make a Paper Plate Magical Unicorn Horn
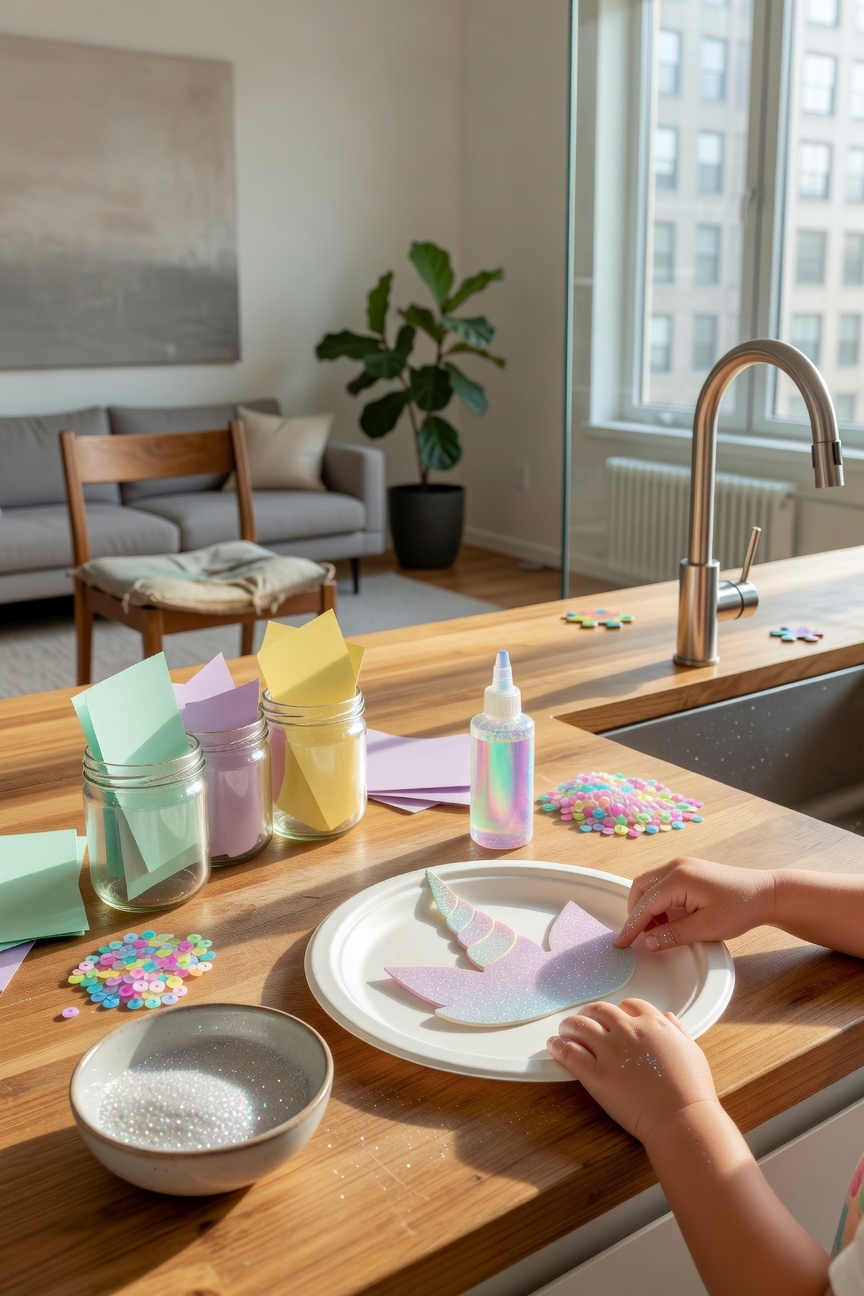
Grab a sturdy paper plate and fold it in half, then cut a long, pointed triangle, about 4 inches tall and 2 inches wide at the base, to form the unicorn’s magical horn. Tape the edges securely, then decorate with glitter, stickers, or pastel paint for sparkle. You’ll create dazzling unicorn crafts and magical decorations that shine proudly on any display. Enjoy your creative masterpiece!
Build a Paper Plate Windmill That Spins
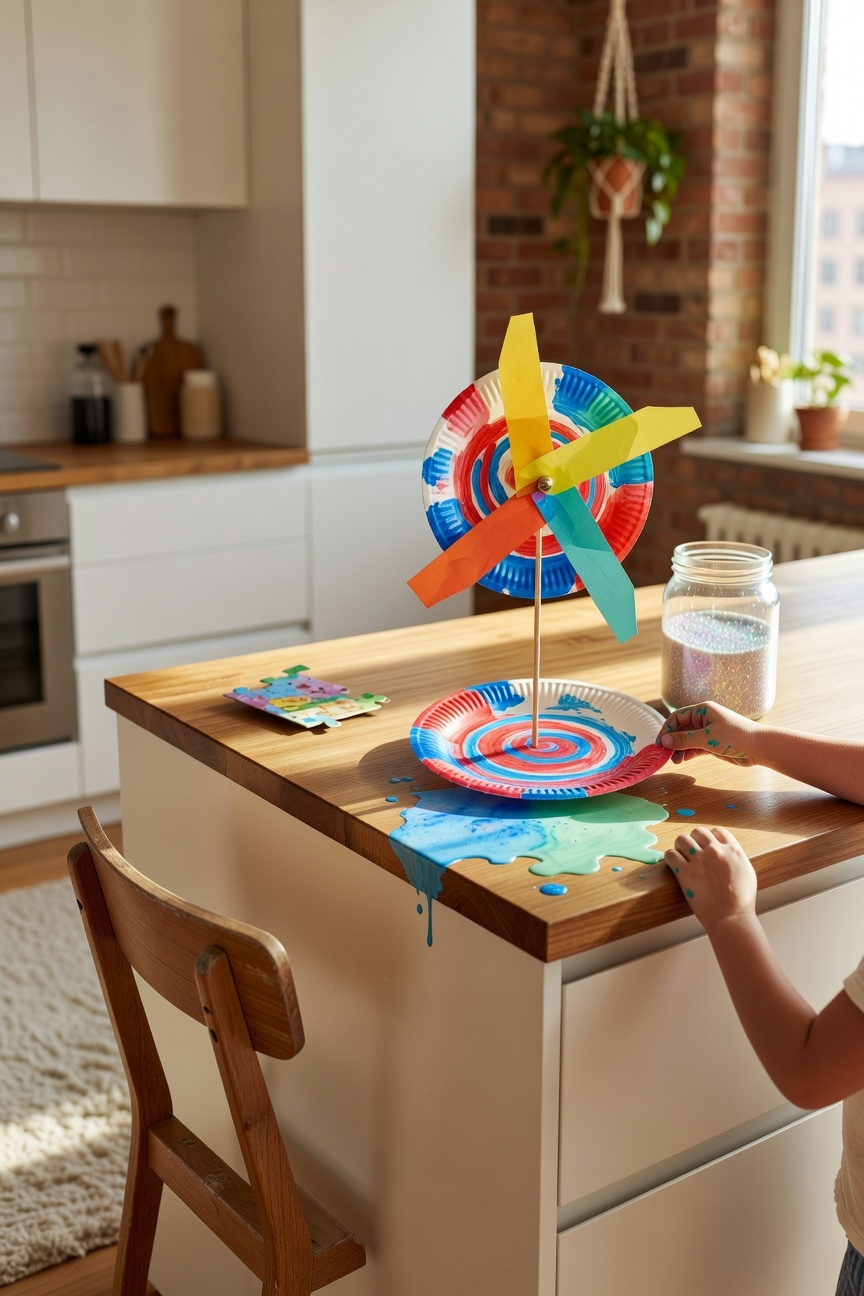
A simple paper plate can become a whirling windmill in just a few minutes! Cut a colorful paper blade set, attach them with safe craft supplies, and secure a pencil‑shaft pivot for smooth spinning motion. Follow simple assembly steps: measure 2 in. blades, glue securely, test outdoors. This DIY fun boosts creativity, encourages teamwork activity, hands‑on learning, and artistic expression. Enjoy!
Construct a Paper Plate Pirate Ship
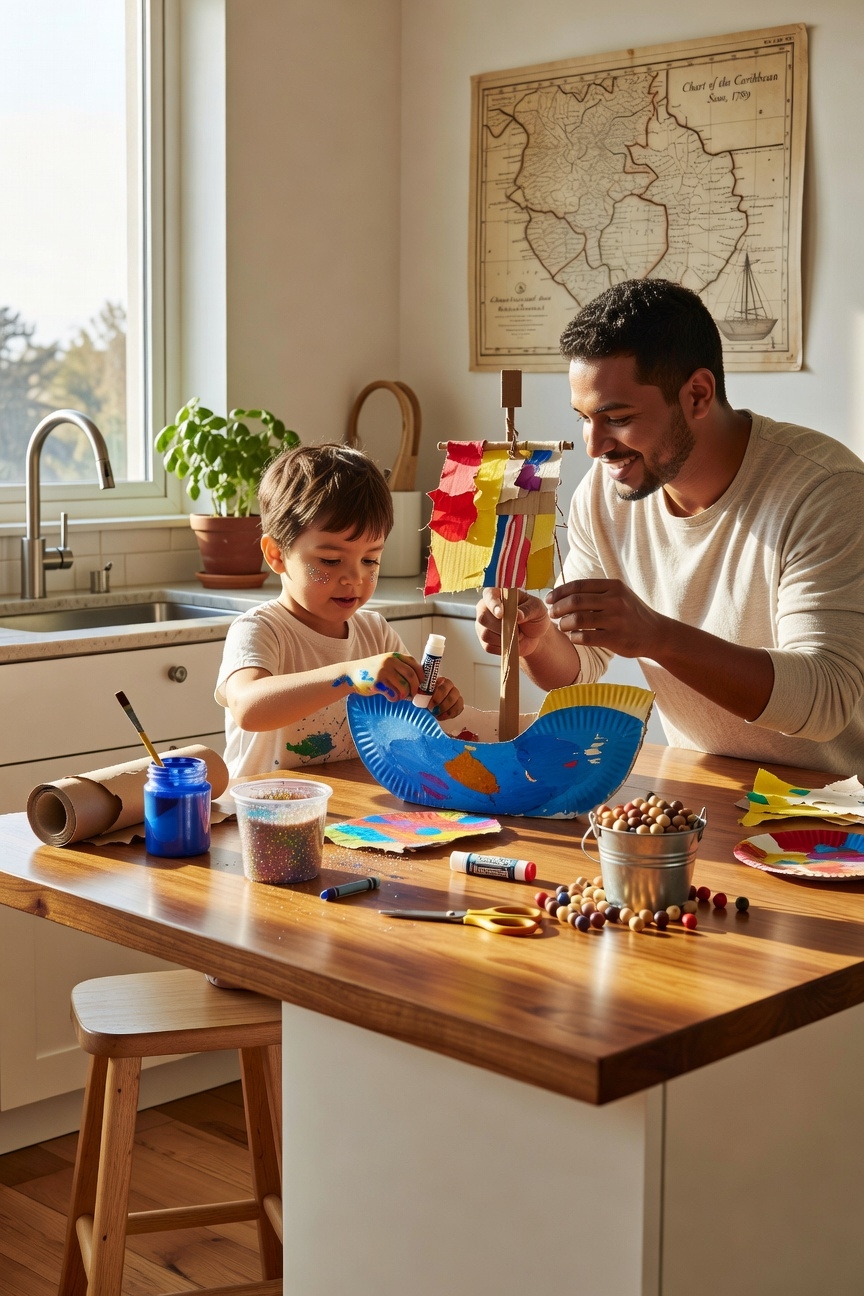
A sturdy paper plate can transform into a swash‑buckling pirate ship in just a few minutes! Cut a triangular sail from construction paper, glue it to a toothpick mast, then attach a small cardboard flag. Tape a paper‑cutted hull edge for stability. Add a paper‑folded steering wheel and a treasure chest sticker. Sail safely, imagine pirate adventures, and discover ocean treasures together!
Create a Paper Plate Bright Rainbow Arch

When you line up a bright rainbow arch, start by gathering three large paper plates, a ruler, and a box of vivid crayons. Cut each plate into a half‑circle, then align them to form a graceful curve. Use rainbow symbolism as you color each segment, blending colors gently for smooth transitions. Secure edges with tape, and admire your radiant, safe masterpiece!
Make a Paper Plate Cheerful Snowman
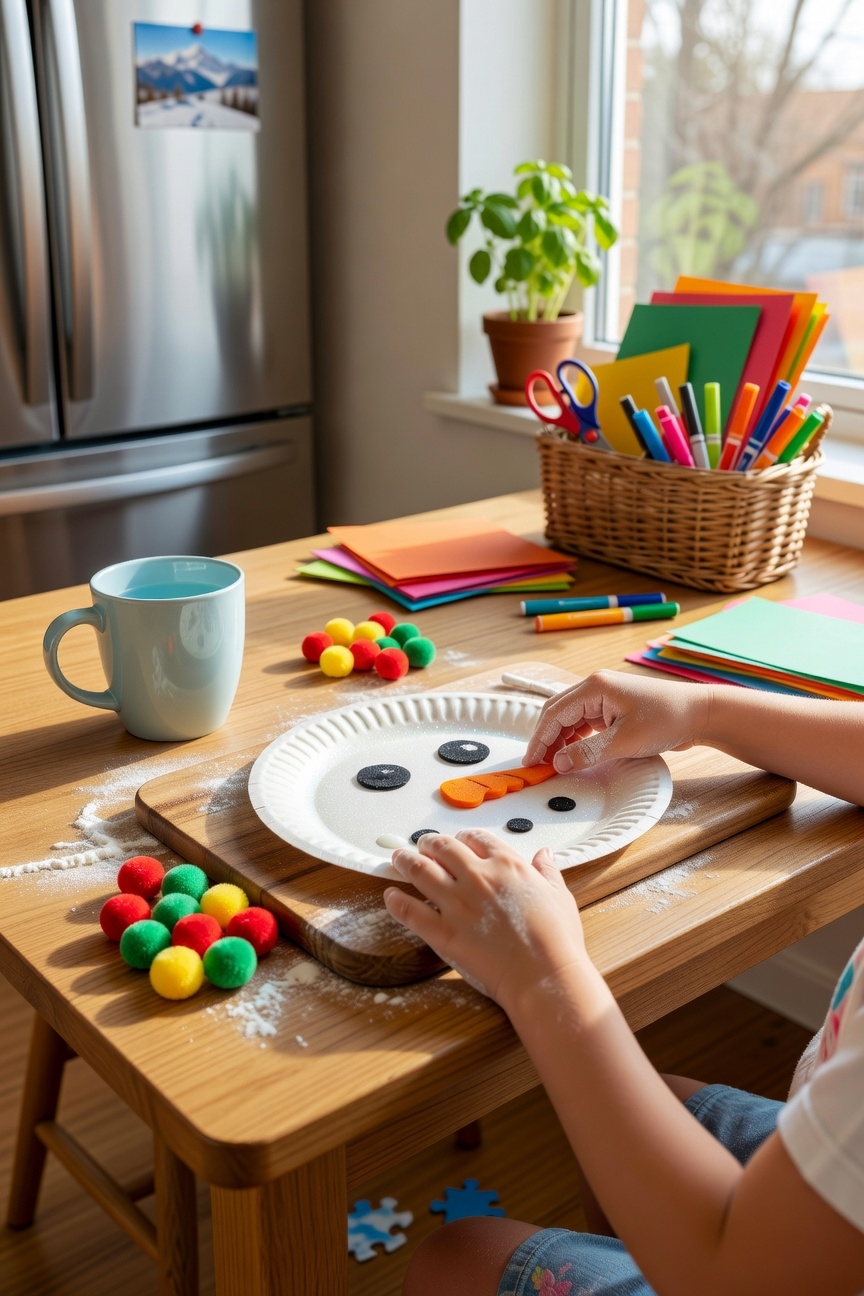
Grab three 9‑inch paper plates, a pair of child scissors, a strip of blue tape, and a box of bright crayons. Stack plates, tape the smallest on top, and draw a smiling face. Cut out orange carrot noses, black coal eyes, and attach festive decorations like glittery scarves. Add snowman accessories, paper buttons, a tiny hat, then proudly display your cheerful masterpiece!
Design a Paper Plate Shimmering Starburst Mobile
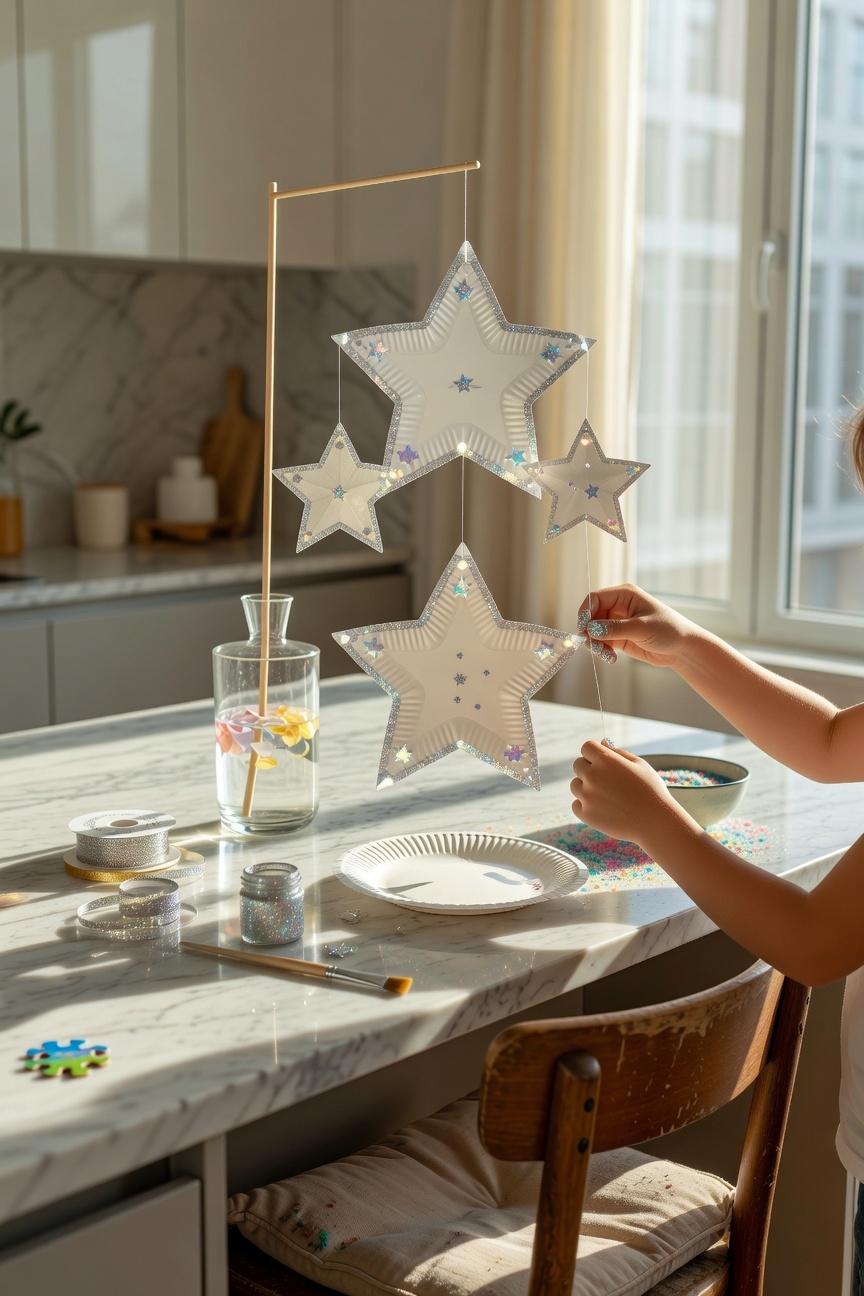
Paper plates become radiant galaxies when you transform them into a shimmering starburst mobile! Cut a plate into five triangular spikes, then coat each with glitter for a paper plate shimmer effect. Punch a tiny hole at each base, thread sturdy string, and tie securely to a wooden dowel. Hang the mobile where sunlight catches the sparkle, kids watch bright bursts dance, feeling proud of their safe, creative masterpiece!
Make a Paper Plate Handy Snack Tray
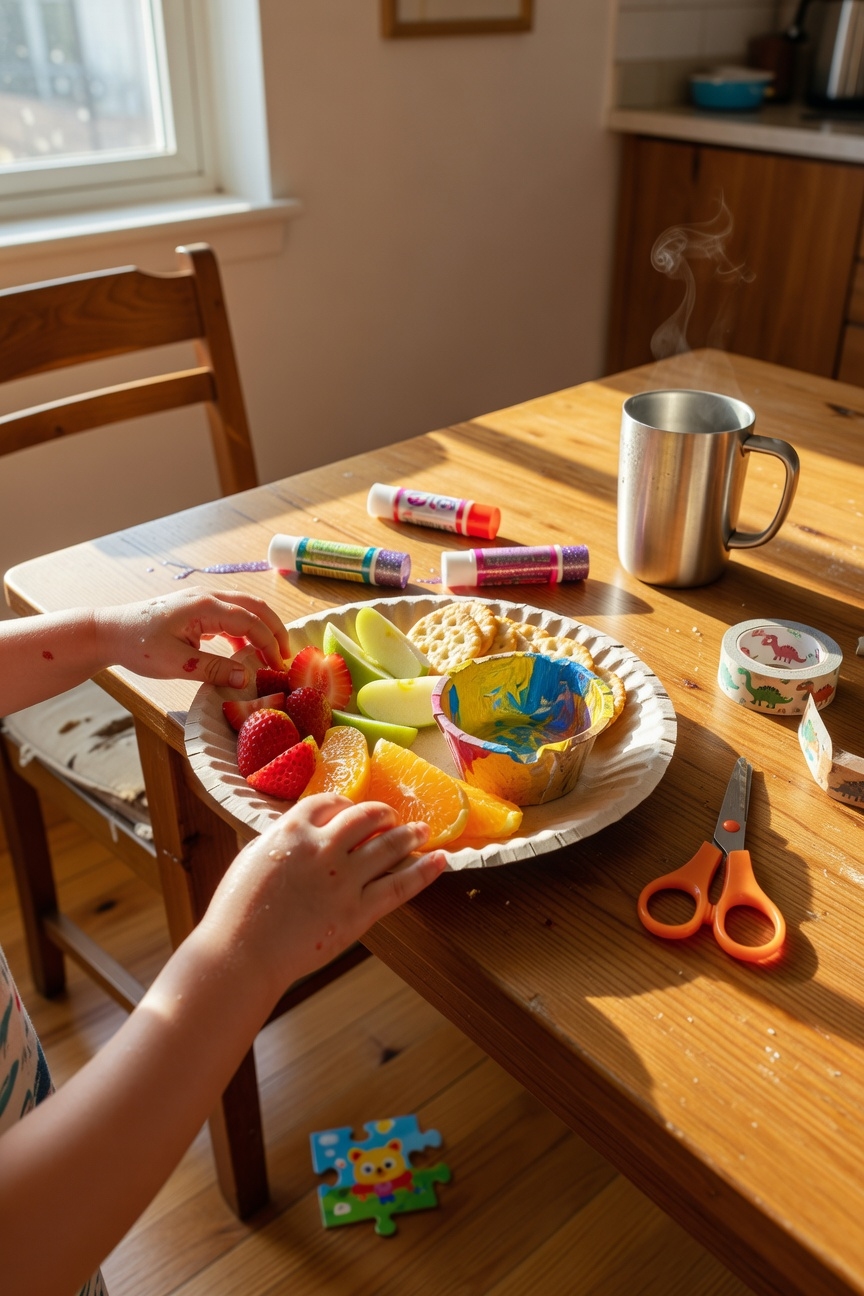
Three simple steps turn an ordinary paper plate into a handy snack tray that’s perfect for crayons‑time treats. First, wash the plate, then apply plate painting techniques, use non‑toxic paints and a gentle brush. Next, fold the edges inward, securing with child‑safe tape. Finally, add snack decoration ideas like fruit‑shaped stickers. You’ll love the sturdy, colorful tray!
Build a Paper Plate Mini Golf Hole
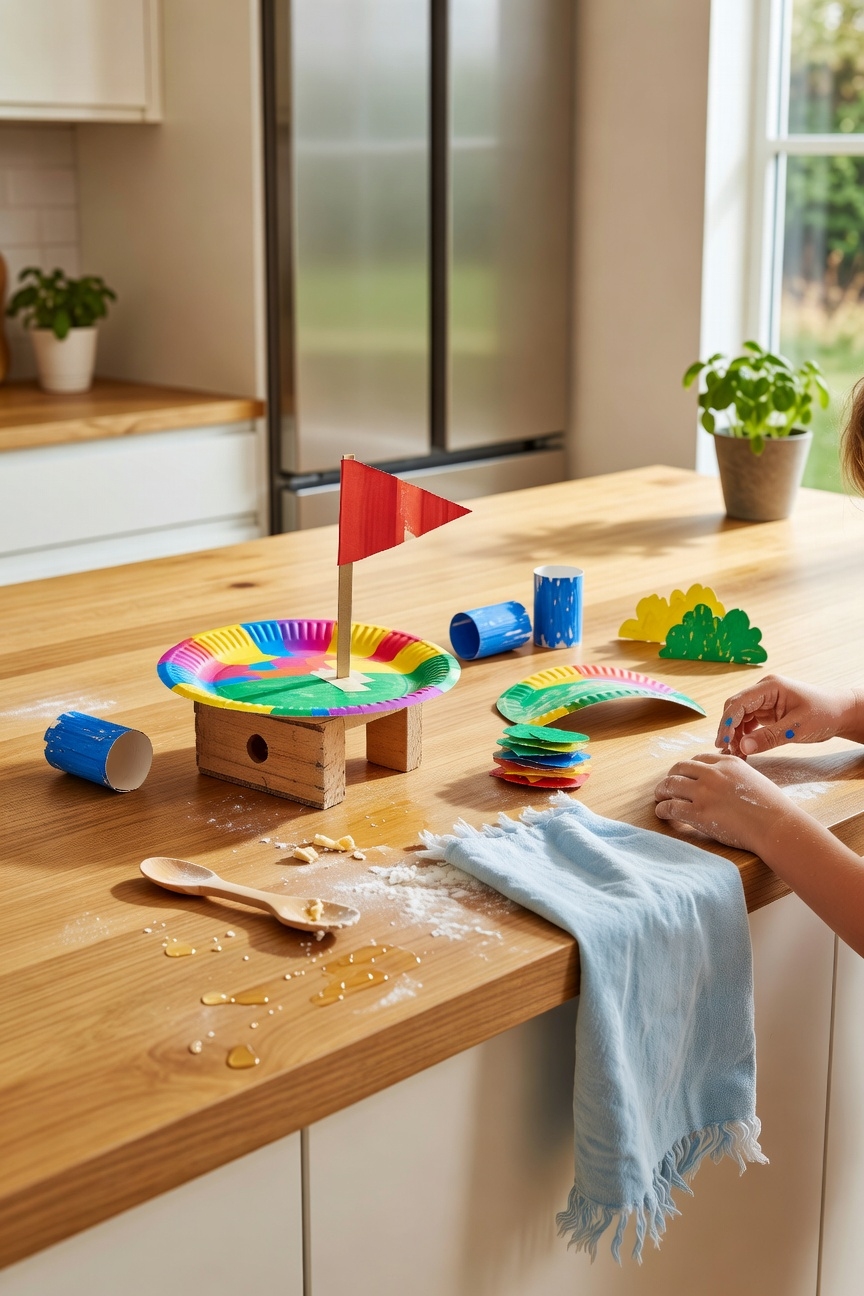
Creating a mini‑golf hole from a paper plate is a quick, fun project that turns a simple kitchen item into a tiny course for your child’s imagination. Cut a 4‑inch hole in the center, tape a bright cardboard ramp for colorful putting, and attach a foam “obstacle course” piece. Secure edges with non‑toxic glue, test the ball’s roll, and cheer when it sinks!
Craft a Paper Plate Festive Halloween Pumpkin
You’ll need just a few supplies: a 9‑inch paper plate, orange construction paper, a green pipe cleaner, black marker, glue stick, and scissors. Cut the plate’s edge to a wavy pumpkin rim, then glue orange paper for texture. Draw a grinning face with the marker, spooky crafts come alive! Insert the pipe cleaner stem, and your Halloween decorations shine at themed parties.
Create a Paper Plate Classic Christmas Tree
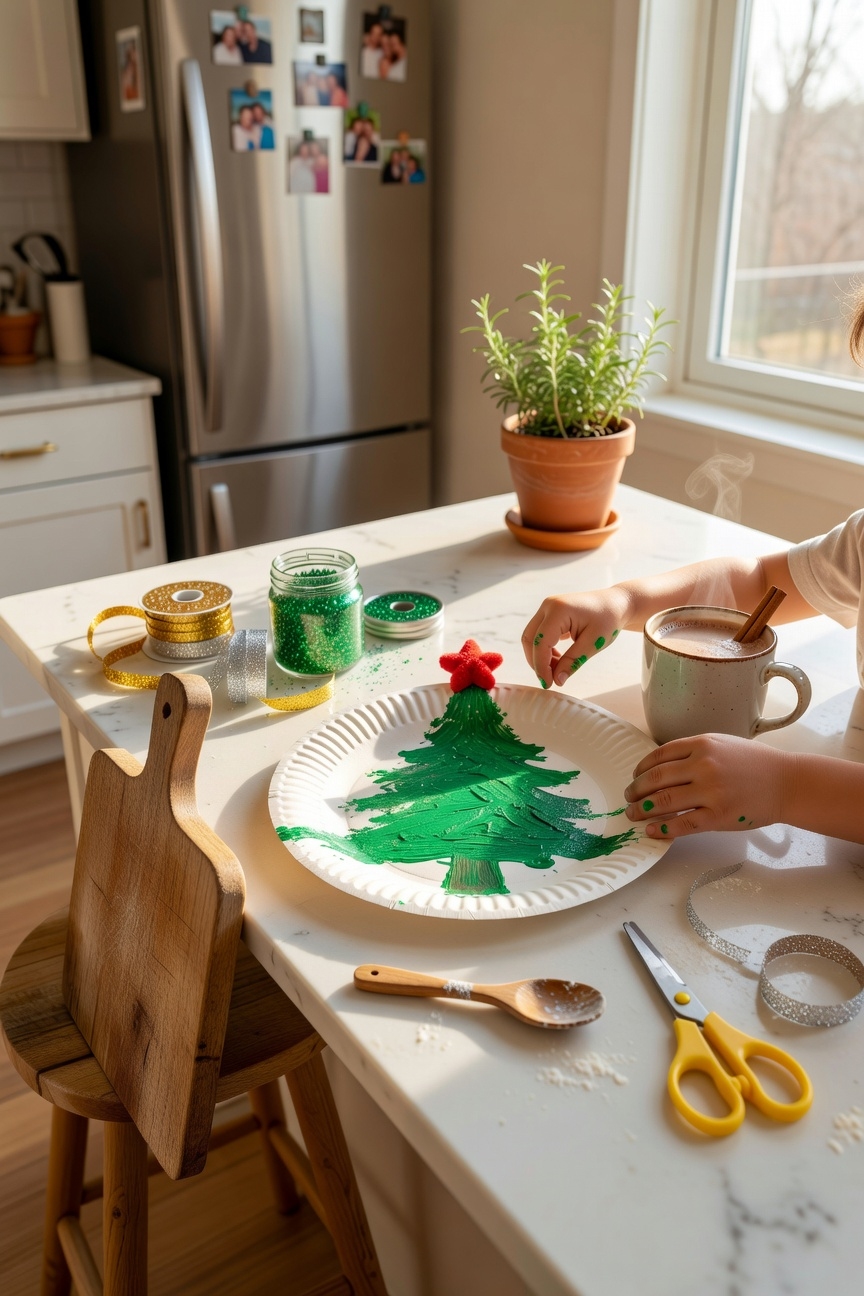
After mastering the spooky pumpkin, grab a fresh 9‑inch paper plate and turn it into a classic Christmas tree that will sparkle on any holiday mantel. Cut a triangle shape, fold the base for stability, then glue glittery green paper strips as branches. Add tiny red pom‑poms for ornaments and a shiny star on top. This safe, simple winter craft becomes a cherished holiday decoration.
Make a Simple Paper Plate Puzzle
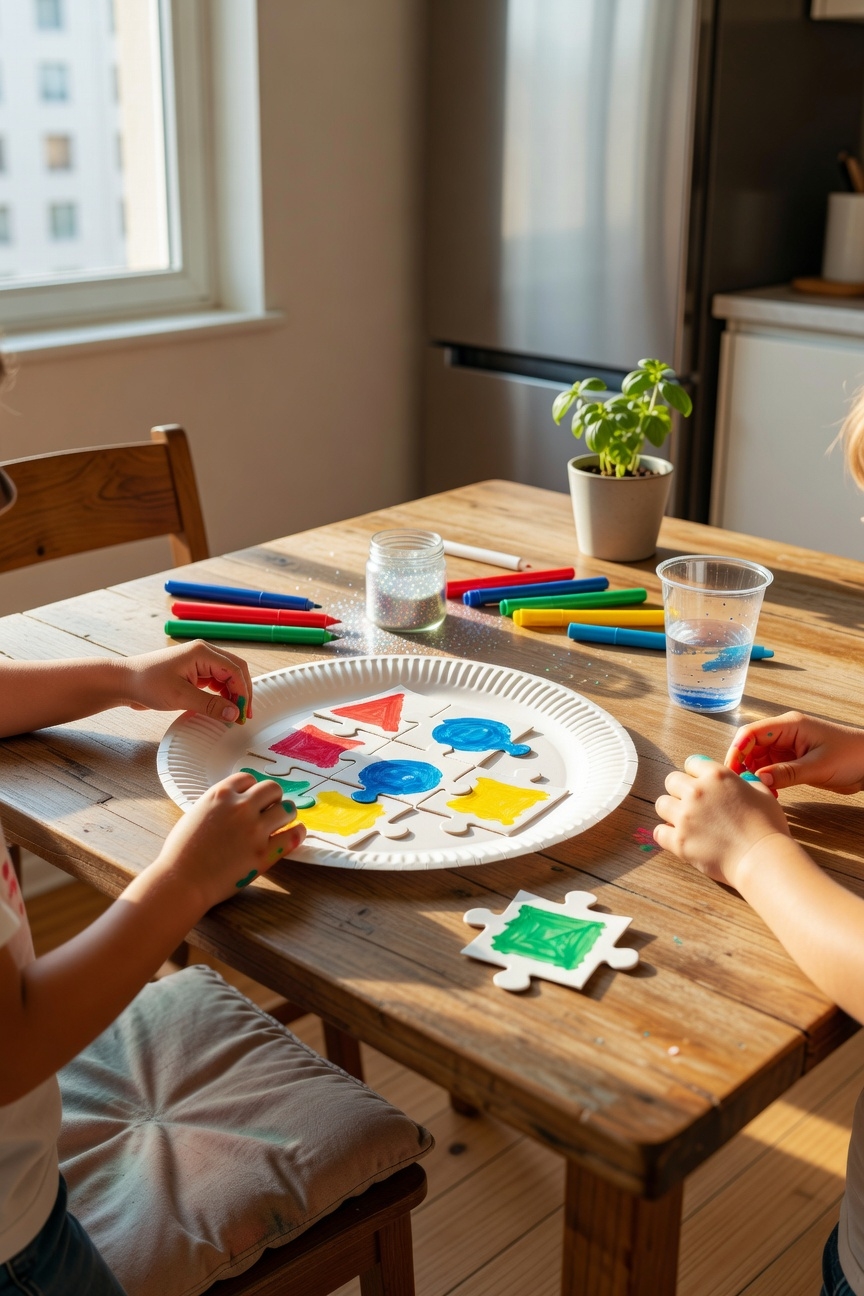
Three simple steps turn a plain 9‑inch paper plate into a fun puzzle that sharpens spatial reasoning and boosts confidence. First, draw a simple shape, then cut along the lines to create puzzle pieces that fit together. Next, decorate each piece for artistic expression, use crayons, stickers, or paint. Finally, reassemble the puzzle, celebrating the bright, safe, and satisfying result!
Final Takeaways
You’ve turned plain plates into bright sunbursts, buzzing bees, roaring dinosaurs, clever masks, blooming gardens, mini‑golf courses, spooky pumpkins, and jolly Christmas trees, all in one afternoon. You’ve cut, colored, glued, and imagined, and now your creations sparkle with personality. Keep experimenting, keep sharing, keep laughing; every fold, every brushstroke builds confidence, creativity, and teamwork. Celebrate each masterpiece, and remember: the next great adventure starts with a simple plate and a big smile!